

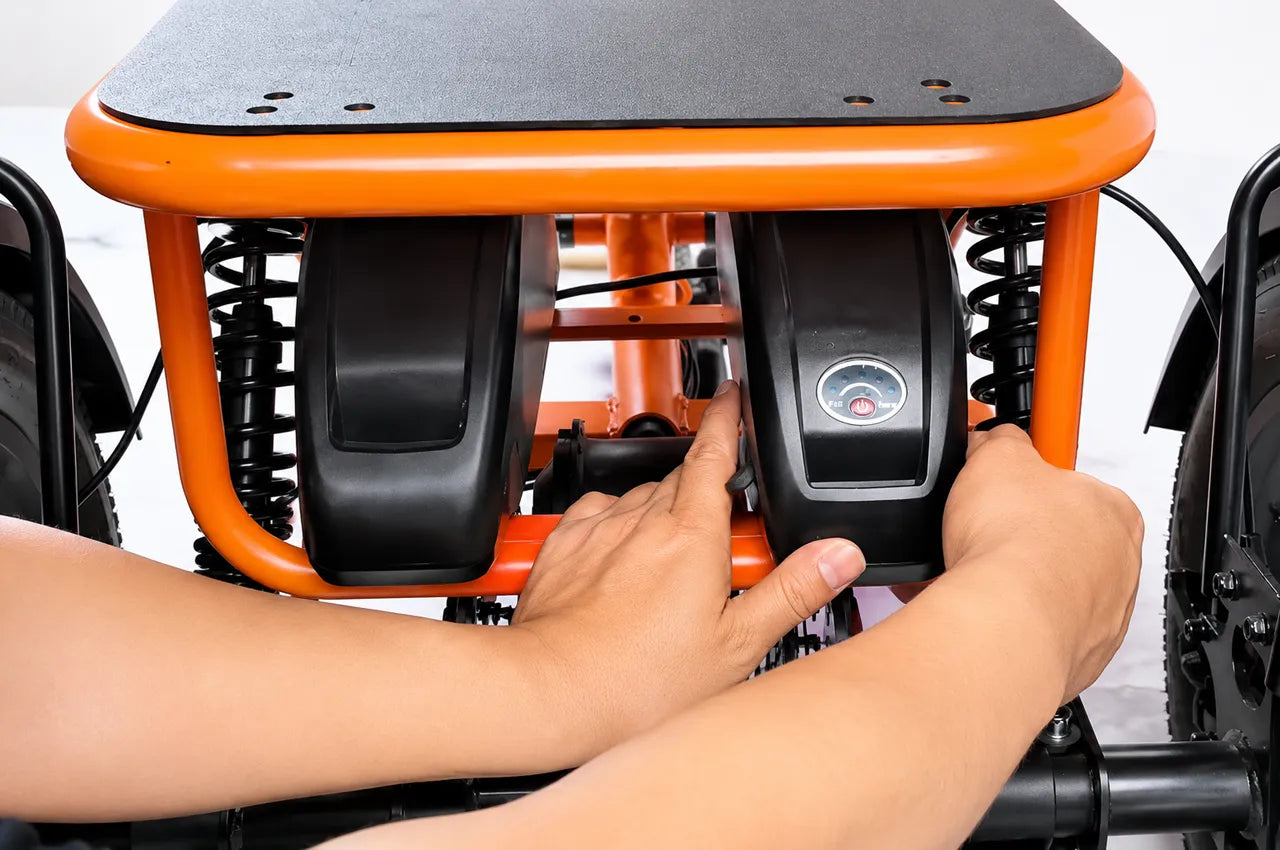
This guide explains how to install the Breeze Pro 2.0 Dual Battery Kit. The installation includes slide rail installation, large controller box installation, controller wiring, dual-power module connection, and battery installation.
Before starting, turn off the vehicle and make sure it is placed on a flat and stable surface. Prepare all required tools and parts before installation.
Step 1: Install the Slide Rails
First, confirm the installation hole positions on the rear frame. Locate the backrest base mounting holes and the seat bottom frame mounting holes.
Remove the four screws on the rear basket of the frame. Then remove the four screws from the backrest base and take out the backrest base.
Next, remove all screws from the black plastic protective plate to prevent interference during installation. After that, remove the two plastic covers on the rear frame.
Use the #8 pipe wrench to remove the original battery track. Then use a Phillips screwdriver and a 10 mm open-end wrench to remove the slide bottom plate.
After the original parts are removed, install the battery slide onto the frame. Tighten the battery slide securely with the #8 pipe wrench.
Step 2: Install the Large Controller Box
Use a T25 wrench to remove the old controller box. After removing the controller box, cut the controller cable ties.
Disconnect all connections to the controller and remove the controller from the original box.
Place the controller into the new large controller box and tighten it with an M3 Allen wrench.
Pass the motor controller wire through the pass coil, then route the wire through the wire pass hole on the controller box. Install the pass coil onto the wire pass hole.
Install another pass coil onto the wiring hole of the controller box for later use.
Place the new controller box onto the rear frame. Pre-install all countersunk screws and nuts first, then tighten them using a 10# open-end wrench and a Phillips screwdriver.
Step 3: Wire the Breeze Pro 2.0 Controller Box
Connect the motor cable plug and tighten it.
Organize the wire harness and secure it with cable ties. Then thread all plugs into the controller box through the through-coil.
Connect the wiring harness connector inside the controller box.
Locate the two red 2-pin taillight connectors and plug them in. Make sure the arrows on the connectors are aligned before connecting.
Locate the two black 6-pin power assist sensor connectors and plug them in. Make sure the arrows are aligned.
Locate the two black 10-pin main cable connectors and plug them in. Align the arrows and insert the connectors fully.
Take out the dual-power module.
Connect the yellow XT60 female connector with the black sheath from one Teflon-coated wire harness to the XT60 male connector on the controller.
Connect the yellow XT60 male connectors from the two silicone wire harnesses to the XT60 female connector on the battery slide.
Waterproof the unused Teflon wire harness. Wrap the yellow XT60 female connector and the orange three-prong plug with insulating tape.
Place the dual-power module into the controller box. Make sure the output terminals of the dual-power module face the controller.
Organize the wiring harness and secure it with cable ties.
After the wiring is complete, reinstall the black plastic frame panel and tighten the screws to restore it to its original position.
Step 4: Breeze 2.0 Wiring Differences and Precautions
For Breeze 2.0, some wiring connections are different from Breeze Pro 2.0.
The Breeze 2.0 motor cable plug is black. When connecting the motor cable, align the arrows and insert the plug fully.
The Breeze 2.0 controller has no screw holes, so the controller should be secured directly with cable ties.
The Breeze 2.0 main harness connector is a black 9-pin connector. Align the arrows and insert the connector fully.
The Breeze 2.0 taillight connector is a red 2-pin connector, the same as Breeze Pro 2.0. Align the arrows before connecting.
The Breeze 2.0 power assist sensor plug is an orange 3-pin plug. Align the arrows before inserting it.
Do not connect the Breeze 2.0 power assist sensor plug to the orange 3-pin female connector on the dual-power module.
As with Breeze Pro 2.0, waterproof the unused extra Teflon wire harness. Wrap the unused yellow XT60 female connector and the orange 3-pin plug with insulating tape.
Connect the yellow XT60 female connector from one Teflon-coated wire harness to the XT60 male connector on the controller.
Connect the yellow XT60 male connectors from the two silicone wire harnesses to the XT60 female connector on the battery slide.
Place the dual-power module into the controller box. Make sure the output terminals of the dual-power module face the controller. Then organize the wiring harness and secure it with cable ties.
Step 5: Install the Batteries
Place the two batteries into the two battery slides.
Lock both batteries securely in place.
Turn on the low-power switches of both batteries. Slide each switch all the way to the “1” position.
Press and hold the battery indicator light to check the battery status.
After confirming that both batteries are installed and powered on correctly, perform a riding test in a safe area. During the test, check that the vehicle powers on normally, the batteries are secure, and there are no abnormal sounds or loose parts.


Share:
Meet the Meet One Breeze 2.0 eTrike — More Trike for Your Money
Why Meet One Trike Is the Best Electric Trike for Seniors