

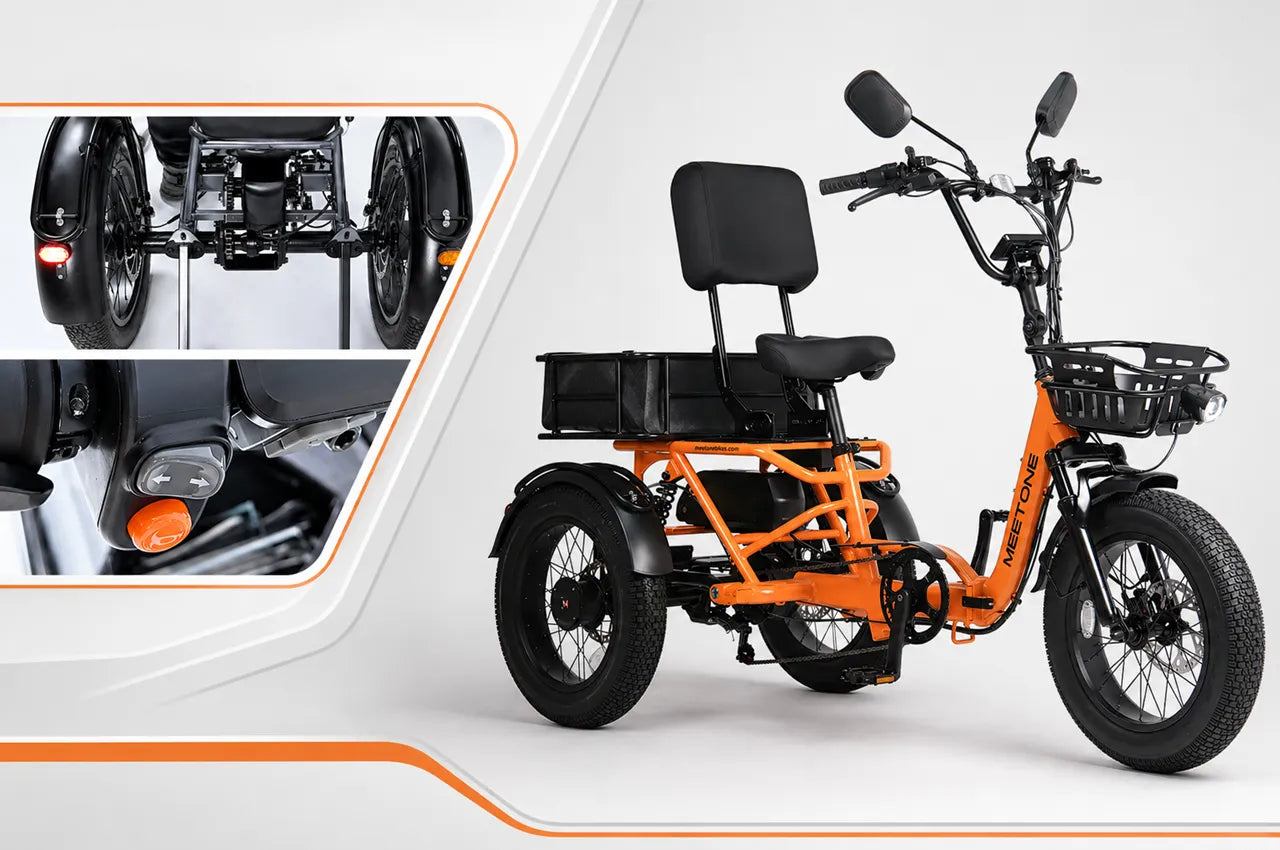
This step-by-step guide will help you install the turn signal kit on your Meet One Breeze Pro 2.0 eTrike safely and correctly.
Before You Start
- Turn off the power before installation
- Prepare an M4 Allen wrench
- Do not cut or modify any wiring harness
- Ensure all connectors are aligned correctly before plugging in
Step 1: Remove Original Components
Turn off the power. Use an M4 Allen wrench to loosen the screws on the left handlebar. Remove the left cable clip, left handlebar grip, and original horn switch.
Insert the horn short-circuit cap into the main wiring harness, then disconnect and remove the original horn switch connector.
Step 2: Install the Combo Switch
Install the turn signal and horn combo switch onto the left handlebar. Adjust it to a comfortable position and tighten securely. Reinstall and tighten the left handlebar cover.
Step 3: Connect the Adapter Cable
Take the 1-to-3 adapter cable. Connect the blue 4-pin plug from the switch to the adapter cable. Make sure the arrows are aligned before plugging in. Secure the connection with a cable clip.
Step 4: Connect to Headlight Power
Locate the headlight connector and disconnect it. Connect the shortest 3-pin orange connector from the adapter cable to the main wiring harness. Then reconnect the headlight to the adapter cable.
Secure all cables with cable ties and ensure they do not interfere with handlebar movement.
Step 5: Route the Main Cable
Route the longest 3-pin orange cable along the frame and pass it through the bottom support bracket. Secure it with cable ties.
Step 6: Install Rear Extension Cable
Take the 1-to-2 taillight extension cable. Route it from the bottom of the seatpost to both sides of the frame and secure it with cable ties.
Step 7: Identify Left and Right Connections
Identify the red 2-pin connectors:
- Connector with yellow label = LEFT turn signal
- Connector without label = RIGHT turn signal
Step 8: Install Turn Signals on Brackets
Attach each turn signal to its bracket using screws. Ensure the correct orientation for both sides.
Step 9: Mount Turn Signals to Bike
Remove the rear fender brackets and reflectors. Install the turn signals onto the mudguards and tighten the nuts. Reinstall the fender brackets and adjust the position of the lights.
Step 10: Connect Rear Wiring
Connect each turn signal to the extension cable on both sides. Secure all wiring with cable ties. Do not cut the wiring harness.
Step 11: Test the System
Turn on the battery and test the switch:
- Left: left turn signal flashes
- Right: right turn signal flashes
- Middle: turn signals off
Installation Complete
Make sure all connectors are secure, cables are properly routed, and no wires interfere with moving parts.
Ready to Upgrade Your Ride?
Make your Meet One Breeze Pro 2.0 eTrike safer and more visible on the road with a dedicated turn signal system.



Share:
The Complete Guide to Electric Tricycle Types: What Every Rider Should Know
The Perfect Mother's Day Gift for Active Moms Over 60
2 comments
At this price point of Etrike the turn signals should be a standard included feature and pre-installed!
And seriously!? NO Instruction PDF!
At this price point of Etrike the turn signals should be a standard included feature and pre-installed!